개발 블로그
[eGov] MVC - Service, Mapper 본문

1. Service


Service 인터페이스 생성, 메소드도 추가
이번에는 인터페이스를 구현하는 메소드를 만들어 주기
OrderServiceImpl , 이건 java class로 만들어준다

만들어진 클래스 이름 옆에 implements Service interface의 이름을 붙임
그리고 Import 까지 함
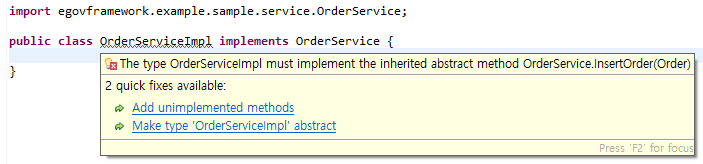
이러면 빨간줄이 이제는 클래스 이름에 빨간 줄이 뜨는데
Service interface에 있는 구현되지 않은 메소드가 있다는 뜻이다
앞서 Service interface 를 만들고 바로 추가한 메소드 때문에 그런것이므로
Add unimplemented methods 클릭
OrderServiceImpl.class에 가서 확인해 보면
바로 추가된다
2. ServiceImpl

OrderServiceImpl.class 클래스 이름 위에
@Service 어노테이션 붙여주고

OrderServiceImpl.class 클래스 이름 옆에
extends EgovAbstractServiceImpl 붙여주고 Import 하기
왜 붙이는 건지 궁금해 찾아봤더니
전자정부프레임 워크로 만들었다는 것을 보여주는 필수요소 라고 할 수 있다
해당 라이브러리는 전자 정부 프레임워크를 만든 공공기관에서 생성한 라이브러리 라고 한다

serviceImpl에 DAO(mapper)를 어노테이션 추가하기
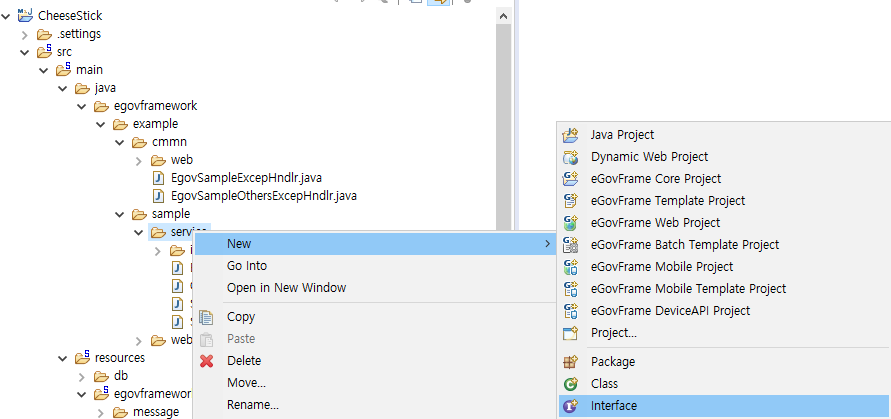
이제 DB에 접근할 DAO(mapper)를 만들어주고 Import 해준다
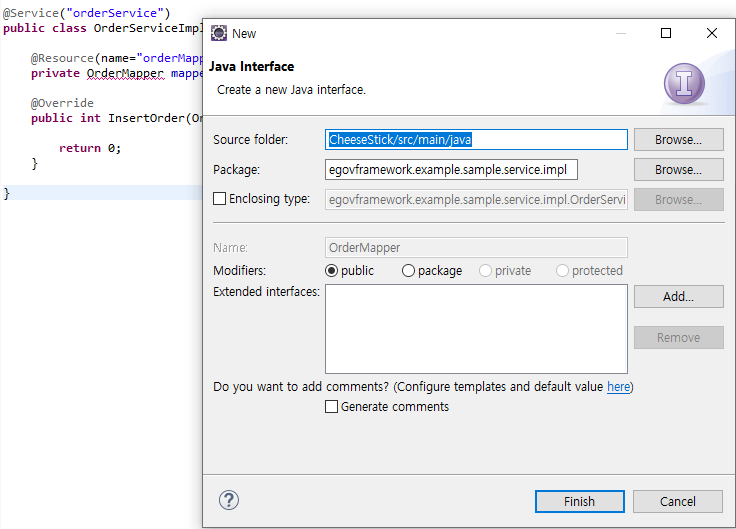
여기서 mapper 클래스는 Interface로 만들어야함
위치는 아래에 context-mapper에 설정해 둔 위치에 만들어 줘야 됨
return 옆에 mapper. InsertOrder을 붙여줌
InserOrderImpl 의 InsertOrder 메소드 리턴 값을 mapper interface에서 DB에서 접근하고 나온 결과값을 리턴하게한다
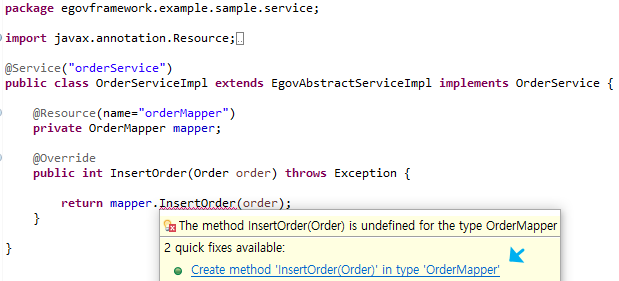
방금 mapper interface를 만들기만 했다
interface에는 메소드가 없는 상태이기 때문에 빨간 줄 생김
위와 같이 자동완성으로 만들어주기
3. Mapper interface
그럼 아래와 같이 만들어져있음
이제는 @Mapper 어노테이션을 적고 egovframework로 시작하는걸 Import 해준다


◎ mapper 관련 설정
serviceImpl 에 mapper interface를 사용하려면

여기에 들어가보면 mapper 설정을 확인할 수 있다
기존에 eGovWebProject 샘플로 설정이 되어 있기 때문에
여기에 맞춰서 파일을 생성하거나 설정을 추가하면 편함
<?xml version="1.0" encoding="UTF-8"?>
<beans xmlns="http://www.springframework.org/schema/beans" xmlns:xsi="http://www.w3.org/2001/XMLSchema-instance"
	xsi:schemaLocation="http://www.springframework.org/schema/beans http://www.springframework.org/schema/beans/spring-beans-4.0.xsd">

	<!-- SqlSession setup for MyBatis Database Layer -->
	<bean id="sqlSession" class="org.mybatis.spring.SqlSessionFactoryBean">
		<property name="dataSource" ref="dataSource" />
                <!-- 공통된 설정을 위한 설정파일 이다. 이 property는 작성하지 않아도 무방하다 -->
		<property name="configLocation" value="classpath:/egovframework/sqlmap/example/sql-mapper-config.xml" />
                <!-- SQL이 작성된 파일의 위치를 패턴으로 설정한다 -->
		<property name="mapperLocations" value="classpath:/egovframework/sqlmap/example/mappers/*.xml" />
	</bean>

	<!-- MapperConfigurer setup for MyBatis Database Layer with @Mapper("deptMapper") in DeptMapper Interface -->
 	<bean class="egovframework.rte.psl.dataaccess.mapper.MapperConfigurer">
                <!-- Mapper 인터페이스 파일이 위치한 패키지 경로를 설정한다 -->
		<property name="basePackage" value="egovframework.example.sample.service.impl" />
	</bean>
</beans>

MVC - Controller 게시글에서 Order.java VO를 만들었었는데
그걸 패키지이름과 클래스이름 까지 sql-mapper-config에 아래와 같이 등록해준다

4. Mapper.xml
그리고 mapper.xml을 기존 xml이 위치한 곳에다 새로 만들어줬다
요기서 중요한점은
- 위에 context-mapper에
mapperLocations 에서 설정한 위치에다 만들어 준다
- mapper.xml 안에 mapper namespace에
mapper interspace의 패키지와 이름까지 적어줘야 두개가 연결이 된다
- mapper interface의 메소드 값은 mapper.xml에 sql문 id와 맞춰줘야 한다

<?xml version="1.0" encoding="UTF-8"?>
<!DOCTYPE mapper PUBLIC "-//mybatis.org//DTD Mapper 3.0//EN" "http://mybatis.org/dtd/mybatis-3-mapper.dtd">
<mapper namespace="egovframework.example.sample.service.impl.OrderMapper">

	<insert id="InsertOrder" parameterType="Order">
			INSERT INTO ORDERS
				( ORDERNO
				  , ORDERNAME
				  , ORDERPAYMENT )
			VALUES ( #{orderNo}
				  , #{orderName}
				  , #{orderPayment} )
	</insert>

</mapper>
그럼 이제 실행이 되고 데이터가 DB까지 Insert 가 된다
'전자 정부 프레임워크' 카테고리의 다른 글
| [eGov] 스프링 시큐리티 기본 설정 (0) | 2023.03.31 |
|---|---|
| [eGov] eGovFrameWebProject sample 삭제 (0) | 2023.03.30 |
| [eGov] Oracle / Mybatis DB 연결 (0) | 2023.03.28 |
| [eGov] MVC - Controller (0) | 2023.03.27 |
| [eGov] 프로젝트 생성 (0) | 2023.03.24 |


